This was interesting – and it took me 3 days to do it. For a pattern designed for ‘advanced beginner’, this is a bit of a beastie… More on that in a minute, first a look at the pattern:
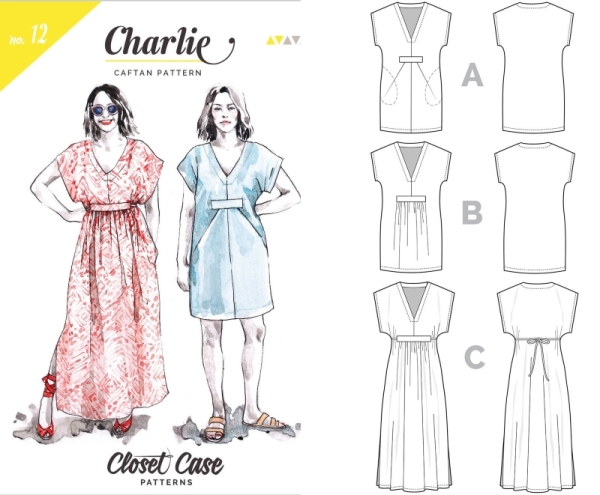
Really cute, with nice options. View A features front pleats, but it doesn’t interest me at all. Views B and C are the ones that got my attention.
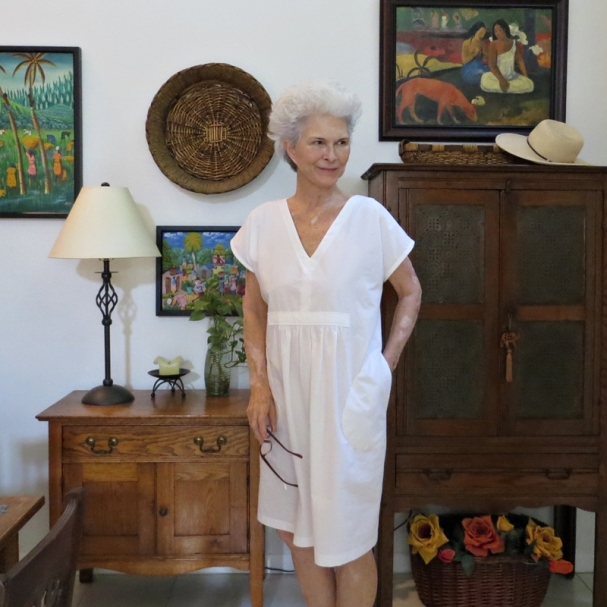
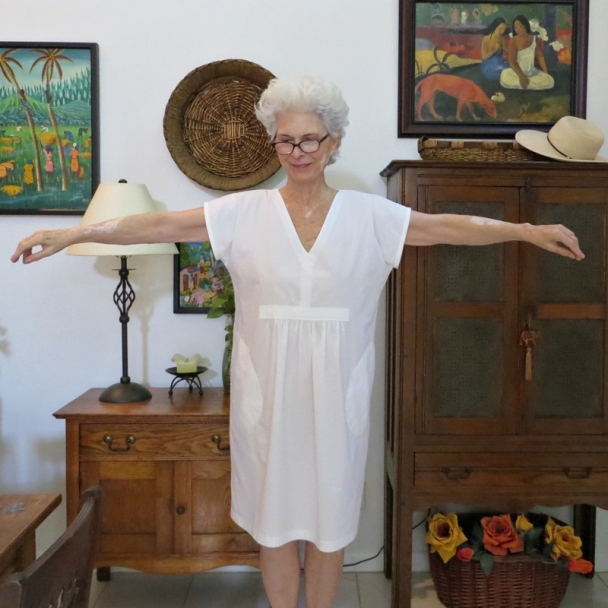
For my muslin, I went with View B, size 10. It has the higher sleeve, no ties, and shorter length.
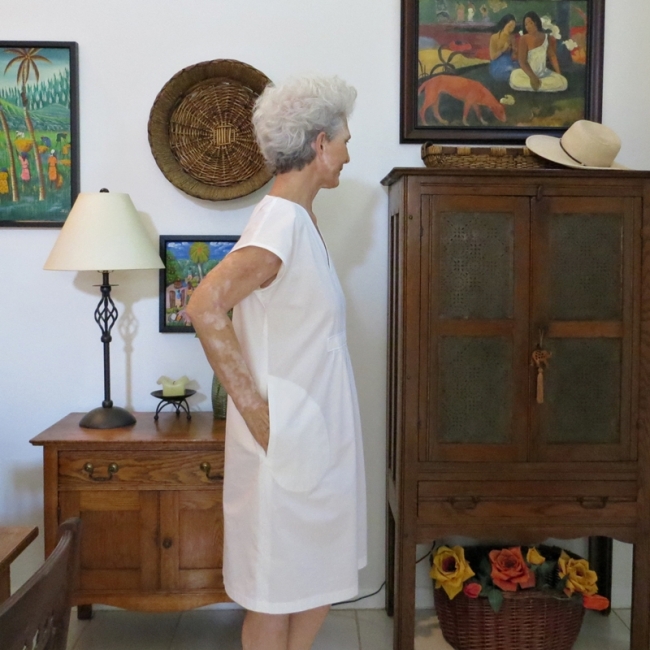
The shape is very simple, pretty much straight up and down from sleeve to hem.

Changes I made to the pattern:
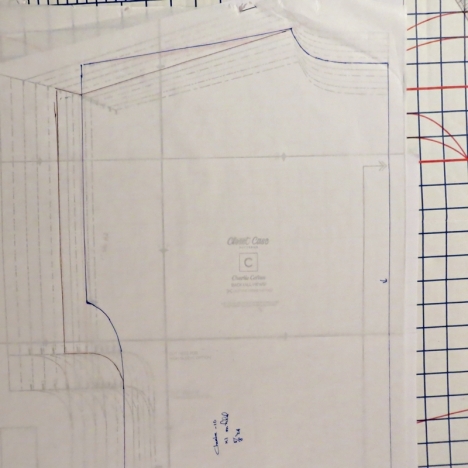
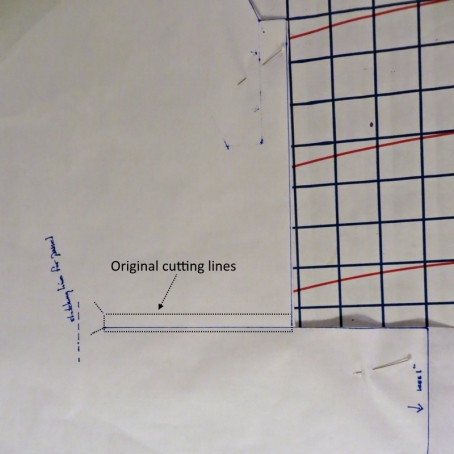
- First, I redrafted the sleeve. I could tell that the downward slant on top, and the tight curve at the bottom, were iffy. The former because it would impede upward movement of the arms and lift the entire dress in the process. The latter, the curve, because it would be difficult to ‘uncrinkle’ and finish nicely.
I used the bodice from the Serendipity Studio Diane kimono dress to change both areas (my lines are in blue). I also left off the sleeve hem allowance completely, since I wanted to bind the edge, not hem it.
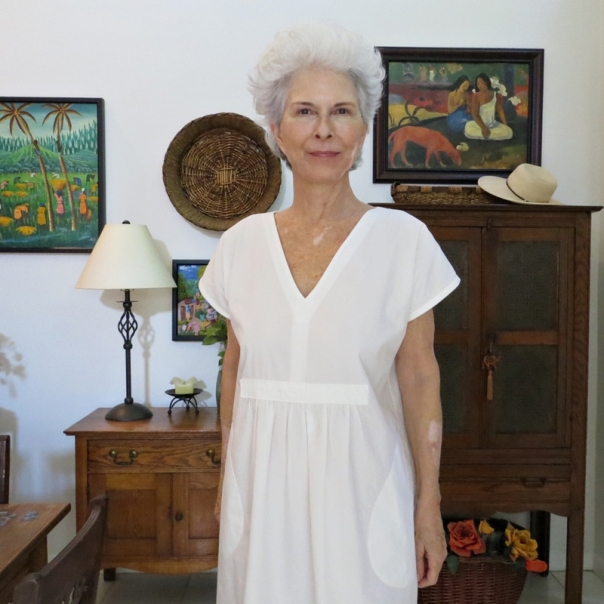
I love the result – it’s so comfortable.
- My second change was to decrease the width of the area to be gathered by 2″. The original ratio of gathers to front panel was 2:1. IMHO, way too much, and likely to pouf out. I don’t need pouf!
- I also drafted a smaller pocket. I wanted to topstitch mine to the front, and the original pocket was huge – it would have interfered with the drape of the front gathers.
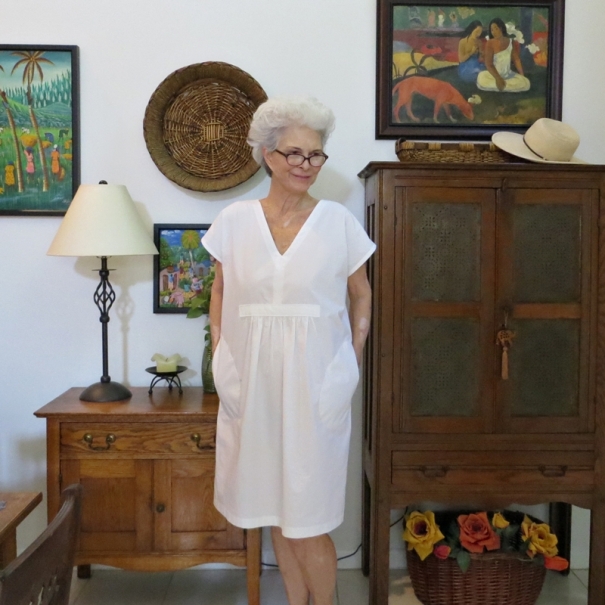
- And I added 2″ to the length.
Now, changes I made to the construction of the dress. As background, that front panel is meant to be inserted into the front, much as a single welt is inserted for a pocket. Except that all 4 sides of the panel have to be sewn in. Oh my gosh, I never even considered doing it that way.
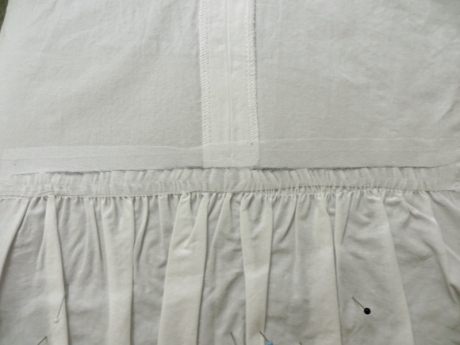
- I used a slit in the panel area, instead of the 1/4″ wide cutout in the pattern.
- I gathered the area under the slits, and fused a 1″ wide strip of interfacing over the whole shebang to stabilize it.
- Next, I basted the panel facing in place in the inside,
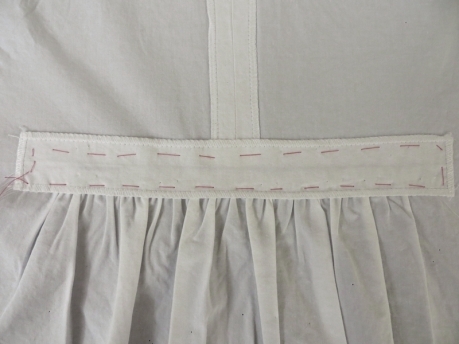
- And the front panel on the outside. Made a sandwich!
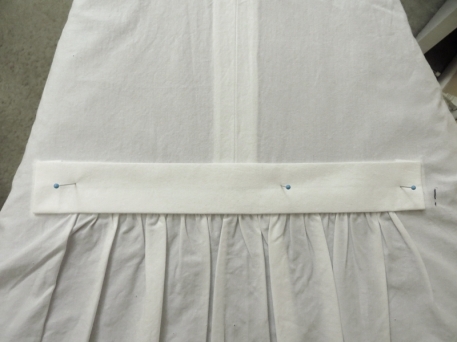
Topstitched to finish, and I really like how it came together. The edges are straight and I didn’t pull my hair out.
I’m considering bringing the front panel in by about 1″ on a future make. I can see how the current width would work well with ties, but without them, it just looks a little too wide. Maybe I’ll just use the panel from View A.
Thoughts: a nice summer dress, a little different, and well-suited for many fabrics and prints. However – that construction business with the front panel is not so nice. The impression I get from the reviews I’ve read (there are only a few, it’s a very new pattern), is that no one is finding it easy to get that panel sewn in properly.
Now that I have a pattern and approach that work for me, I’m sure I’ll sew this again, both long and short. Meanwhile, I’m curious about other sewists’ experiences with the pattern…
Bye for now – Coco

Well, I owe you a big thank you for this post! Being a similar age to you, I do have a lot of sewing experience, but that panel section really drove me mad. Despite understanding how it all went together, I just could not achieve a good finish. I could have happily have thrown it in the bin at times, but I loved my fabric and the style and fit of the pattern. So, armed with your instructions, I tried your solution. Perfect!
LikeLiked by 1 person
That’s wonderful, Sheree! Closet Case just posted a tutorial on the panel insertion – and their sample is not very pretty. It’s such an important detail, like the focal point! I’m glad you conquered it 🙂
LikeLike
I saw your dress in Instagram and fell in love with it. I just found your blog post and am sold on this pattern especially because of your clever alterations. Thank you!!!!
LikeLike
Thank you for sharing the details of your changes. I will probably be doing most if not all of them. That panel looked very very fiddly and not sure it would be worth the effort! I also thought the short length would be unflattering on my body and glad to see how nice yours looks at knee length. Love all of your finished versions. Very elegant and cool for summer. But then you always look elegant!
LikeLike
oh, this is a nice look on you. I struggle a bit with cut-on sleeves and usually make them into cap sleeves. I will definitely be studying your alterations. It is a great summer dress!
LikeLike
I love the ovely tunic! I didn’t know thatpattern, but I will add it to my wish list. You did a great job.
LikeLiked by 1 person
You’ve whetted my appetite to see what you use for fabric in your final version! Love the changes you’ve made as well – I’m seeing more of these pop up on social media and some I like better than others but consistently I’m reading how many have had to shorten the sleeve depth and similar struggles with the front panel.
LikeLiked by 1 person
I definitely like your sleeves better. I hate giant wind tunnel armholes! All your changes made for a much more wearable dress. Did you raise the neckline V as well? I’ve heard a few have had issues with it being too low.
LikeLiked by 1 person
Hi Louisa! I didn’t change the neckline depth at all, and on me it feels fine, no issues with peek-a-boo bra or girls 🙂 I like where it falls, it adds nice balance to the front panel and length of the dress.
LikeLike
This looks lovely! Your pattern tweaks make a big difference.
Just a thought … Did you consider sewing that panel as a sandwich just on the bottom seam – panel, gathers, panel – then flipping it up and proceeding as you did with the topstitching. Might allow you to omit the interfacing.
LikeLiked by 1 person
Thanks! I did consider it, but went with fusible because it was just as easy. Fun to consider the possibilities though!
LikeLike
I’ll bet that ten different people would come up with ten different ways of doing the same thing, and each would find their own way the easiest. All that matters is the results – and your outcome looks great.
LikeLike
Thanks for sharing your work-around tips for installing the front panel! Although I’m making version ‘A’ with the pleats — which will probably be less fiddly than the gathers — I was NOT looking forward to that panel insertion. Topstitching it will be!
LikeLiked by 1 person
Thanks, Jocelyn – hope it goes smoothly for you!
LikeLike
Very sweet! It’s a cute tunic/dress but I just pass over cut on sleeves for myself. They rarely look good on me. That cute front detail might make me reconsider or just try it on a pattern with set in sleeves…hmmmmm.
LikeLiked by 1 person
thanks, Theresa. Bet you can draft it on something you have, you’re good with that!
LikeLike
I like your muslin. I have not read any reviews for this pattern. I don’t think this style suits me. I do like how you did the panel!
LikeLiked by 1 person
Thanks, Linda!
LikeLike
Great looking muslin!
LikeLiked by 1 person
Thanks, Faye!
LikeLike
Oh, so interesting! I made the caftan as a tester and I didn’t have any problems with the panel. I did apply a strip of fusible knit interfacing over the rectangle before I cut it because I had a pretty loosely woven gauze fabric.
The higher sleeve was not an option during testing and I LOVE seeing your pattern adjustment. Your finished garment looks fabulous…somehow white and caftan and Florida just go together so well!
I’d love to see you make a maxi version with your tweaks! Please, please, please!
LikeLiked by 1 person
What fun to be a tester of this! I’d love to see your version. OK – that panel – you’re not an advanced beginner, and your sewing is always beautiful. I wonder if it actually was tested by beginner sewists… I think Heather is doing a tutorial on it soon.
LikeLike
Glad you got the “issues” worked out; it’s turned out to be a darling summery dress! Enjoy!
LikeLiked by 1 person
Thanks so much, Linda!
LikeLike